

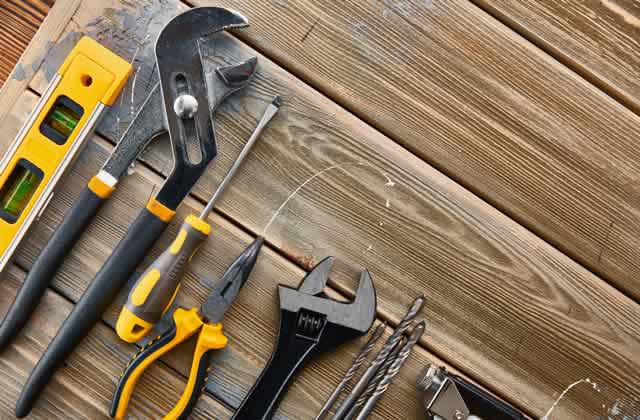
Minor malfunctions are a part of our daily lives.
In many situations, we are not in a position to leave all repairs to experts.
Sometimes it is useful to learn how to fix some malfunctions or to properly maintain the condition of your apartment or home.
Not only will you gain useful knowledge and skills, but you will also be able to save money, which is an added advantage, especially if you are a student.
We have prepared for you a list of the most common malfunctions and how to fix them in the easiest and fastest way.
1. How to repair the plug of any appliance
Our homes are full of household appliances. It usually works reliably, but plugs often break and need to be either repaired or replaced. Most often, a plug will stop working as a result of loosening of the cord-to-prong contacts.
To repair the plug,
- Disassemble it with a screwdriver, strip the ends of the wire, fold them into rings, put them on the rods, and, to restore the contacts, tighten the screws, and then reassemble the case.
- If the plug is non-separable, then there can be no question of repair, since this will break its insulation and a short circuit cannot be avoided when the appliance is connected to the network.
- Usually, a conductor is damaged by such a plug at the entrance to the case, so it is necessary to replace the plug by cutting off the damaged one.
2. Repair the socket
If the socket in the house heats up or even starts to melt, this is an indicator that it needs urgent repair.
- First, de-energize the line by unscrewing plugs or turning off the appliances.
- Make sure there is no current flowing into the outlet. To do this, use a special indicator (outwardly it resembles a screwdriver with a light bulb in the handle), which can be purchased at a hardware store.
- To open the outlet, unscrew the bolts that secure the cover, remove it and carefully inspect the contacts, since, as a rule, the reason for the heating of the outlet lies in them. The quality of the contact is easily determined visually: it is darker, often slightly bluish.
- Feel the wire gently. If it is loose, just tighten the contact with a screwdriver. If you notice that the bolt has oxidized, unscrew it, clean it and replace it.
- At the same time, work carefully, as the wire becomes fragile from heating and may break off. If the insulation is damaged on it, restore it by wrapping it with electrical tape. After that, close the socket with the lid and follow all the steps in reverse order.

3. How to hang up the chandelier
Hanging up the chandelier and connecting it is not as difficult as it may seem. But before you start work, check if the line is de-energized.
If you want to hang a new one instead of the old chandelier, then there is already a hook in the ceiling. If it is not there, drill a hole under it, install the hook, fix it securely and hang the chandelier on it.
- Next, connect the wires from the chandelier and the wiring leads. For this purpose use the mounting panel (connector block) that is included in the luminaire kit.
- Proceed as follows: unscrew the screw with which the decorative cap is attached to the rod of the chandelier, strip the ends, insert the wires into the block and tighten the screws.
- If you just twisted the ends of the wires, be sure to wrap them with insulating tape. All that remains is to lift the decorative cap and fix it with a screw.
4. How to fix leaks
If you notice water dripping from the faucet in the kitchen or bathroom, the reason for this is a worn gasket on the shut-off valve. For starters, you’ll need a new gasket. Then you can proceed to repair.
- First of all, turn off the water by turning the shut-off valve clockwise until it stops. If the crane does not give in (this happens if it is rarely used), you do not need to resort to the lever, otherwise you will break the crane and add yourself problems.
- To cope with the tap, drip a few drops of a mixture of engine oil with kerosene into the gap formed by the valve stem and gland nut. After a while, start turning the valve gently, adding the mixture. When it is sufficiently developed, screw it tight.
- To replace the gasket, open the valve fully and, turning counterclockwise, unscrew the valve body, remove the damaged gasket, insert a new one, wind a linen winding under the stop edge of the valve, put the valve back in place and use a wrench to tighten its body.
5. Blockage in the sewage system
A blockage in the sewage system is a fairly common phenomenon. The main reason that causes it is grease, small debris, which gradually accumulates and blocks the pipe.
There are several ways to clear a blockage.
- For example, you can pour a special liquid into the drain hole, and, after waiting the necessary time, rinse the pipe with plenty of hot water. If the blockage is small, then this is quite enough.
- With old pipes, the situation is more complicated, since the waste has been packed so tightly over several years that it cannot be dealt with by chemical means. Depending on where the blockage has formed, you need to act in different ways.
- If we are talking about a toilet, then you can use a plunger. Pressing it against the drain hole, make several movements up and down. As a result of the pressure drops that occur in the pipe, the blockage will collapse.
- The same can be done to eliminate the blockage in the bath, the main thing is to close the emergency drain hole (it is located in the upper part of the bath).
If the water does not leave in the sink, then most likely the siphon is clogged (this is a curved tube with water, thanks to the water seal, unpleasant odours do not penetrate the room).
- Disconnect the siphon from the drain hole and the drain pipe (do not forget to substitute a bowl), rinse and reinstall.
- To remove the blockage in the pipe, you must have a special cable. The work will go faster and will be more effective if you have an assistant- one pushes the cable into the hole (drain or in the branch pipe), and the second twists the cable, creating the necessary tension (a sagging cable will do nothing).
- When you have cleared a blockage or used the full length of the cable, make two or three back and forth movements and remove it. As you can see, good quality drain cleaning can be long and complicated process, but is manageable.
6. Repair the furniture
Scratches on furniture appear during transportation or assembly. They, of course, spoil its appearance, so it is advisable to eliminate them or at least disguise them. There are different ways to do this, here are some of them:
- from a specialist store, buy a putty that matches the colour of your furniture, fill in the scratch and apply a coat of varnish. For reliability, first test the composition in a place that is not too conspicuous so as not to spoil the furniture completely;
- furniture wax, which must be used in accordance with the instructions, will help to hide the scratch;
- if damp gauze is placed on a small scratch or a minor chip and pressed with a hot iron, minor damage will disappear due to the fact that the wood expands under the influence of steam;
- a shallow scratch will be masked by the lead of a matching pencil. To do this, melt its pieces and rub into the defect;
- a scratch on light furniture can be eliminated by a walnut kernel, which must be rubbed into it.
7. Easily fix the doors and windows
If the door or window is jammed, then to eliminate this defect, change the inclination of the door leaf or window sash relative to the frame.
- To do this, place a cardboard gasket along the loop – under the top one if it is jammed from below, and under the bottom one if it is the other way around.
- This can also occur due to the gap between the canvas or binding and the box. In this case, deepen the hinge slots so that they sit a little tighter.
other related articles of interest:
Sometimes the door bounces due to the fact that the canvas is too tightly adjacent to the quarter chosen in the box.
- To eliminate the defect, it is necessary to trim a quarter on each side or only on one.
If you want to shorten the door leaf, then it is important to do it so that the cut is even.
- To do this, temporarily attach a board or block to the back of the blade, which will act as a guide when you work with a hacksaw or circular saw.
Conclusion
In order for all engineering systems in the house to function normally, it is necessary to monitor them and engage in prevention. Despite this, problems do happen from time to time. But, as you can see, it is not always necessary to call a specialist.
Small breakdowns can be dealt with on your own. All these minor repairs even an unprepared person can do, but if you notice something more serious, don’t delay calling the experts.
Image Credit: how to save money on repairs by envato.com
end of post … please share it!
FOR JUNE: view college planning tasks for June (part of HS college calendar)


Comments